
Summary
Orders are a key functionality of ShowMgr. An order is a task that is created for a Project, such as creating a storyboard, editing tape, or recording a voiceover. A project will normally have numerous Orders associated with it. This article will walk you through the basic steps for creating an Order as well as modifying and editing existing Orders in ShowMgr
- Using the left navigation panel, click Orders to open the Orders workspace. Note: First-time users will see a blank workspace while existing users may see a screen populated with search results
- To create a new Order click the
 button, located at the top of general workspace
 - Choose the Order Class by clicking on the drop down arrow on the right hand side of the Order Class field

- Complete the Order form attributes. These will vary based on Order Class chosen. All mandatory fields are in highlighted in red.
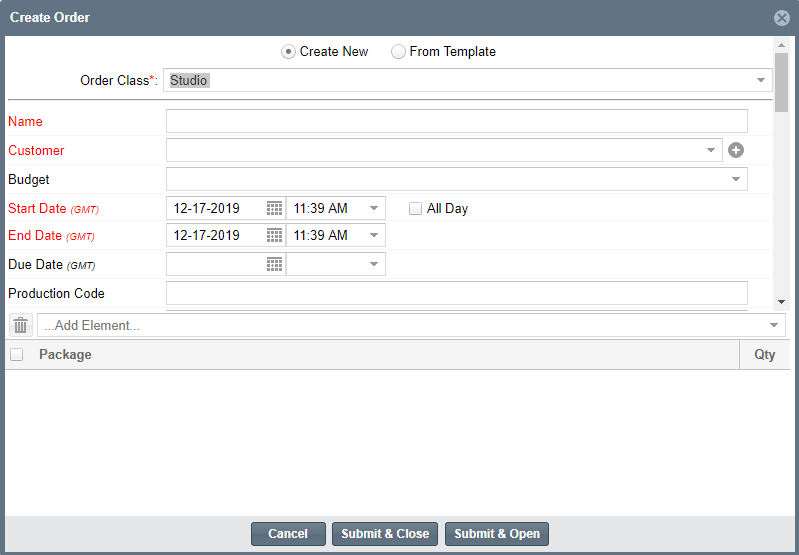
- Click to Submit & Open to add or edit Order information, add Bookings to the Order, add contacts to the Order, or change the Order status
- Click Submit & Close to close the form and return to the Orders general workspace
A note about inheriting attributes : If you choose to create a an Order from a Template which sets defaults for some fields, and you then add a Project that has a different attribute for that field, be aware your settings on your Project Order Class may cause the field to change. For example, you may have a System Division pre-set as part of the Template and you add in a Project that has a different System Division. If you have Child Orders Inherit selected in the Project Order Class, then the Order will inherit the new System Division.

After opening an Order, you can edit the Order, add the Order to Bookings, create clones of the Order, and change the Order status by clicking on any of the Order Driver Buttons (Note: Access levels will determine which driver buttons are available to a user)
 Details Tab
- View and edit the Order details
 Phases & Milestones Tab
- See the milestones and schedule for the Order
 Worksheet Tab
- Add Bookings, add Contacts, add or edit Actuals, Clone Orders, and display the financial perspective of the Elements associated with the Order
 Documents
- Upload relevant documents to the Order
The Worksheet tab displays the financial perspective of the Elements associated with an Order. To view an Order worksheet:
- Select Orders
- Within the Orders Grid, select an Order to open and double-left click to open the Order to your set default tab.
- Click the Worksheet Tab
- If a Package was selected when the Order was created, a list of the Elements included in that Package will be displayed
- If there are no Elements listed, or an Element you need for this Order is not displayed, you can easily add an Element
- If a Resource name does not display with the Element, this indicates that a Resource has not yet been assigned to the Element, however you can easily assign a Resource to an Element
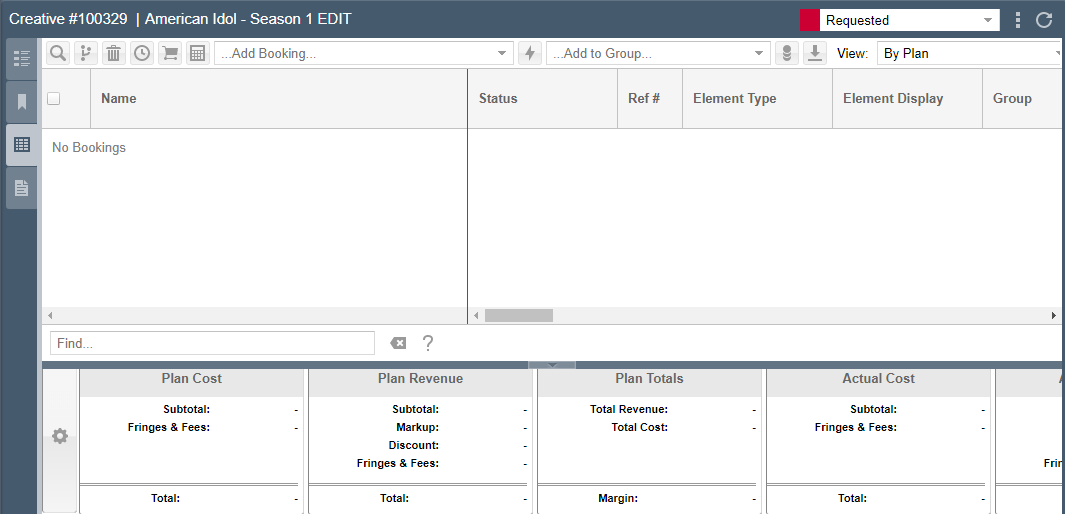
- Click an Element to open the Element Details, which contains the plan, source, and budget for that element. Make any desired changes, then click Submit
- To view the financial information for the Order you can see the revenue, costs, margins, and variances in the bottom section of the screen. You can modify the settings by clicking the Configuration
 icon
icon
- At the top of the Order Worksheet Click the Add Booking text box, then type the general name of the Element you wish to add. A list of Elements matching the name will display
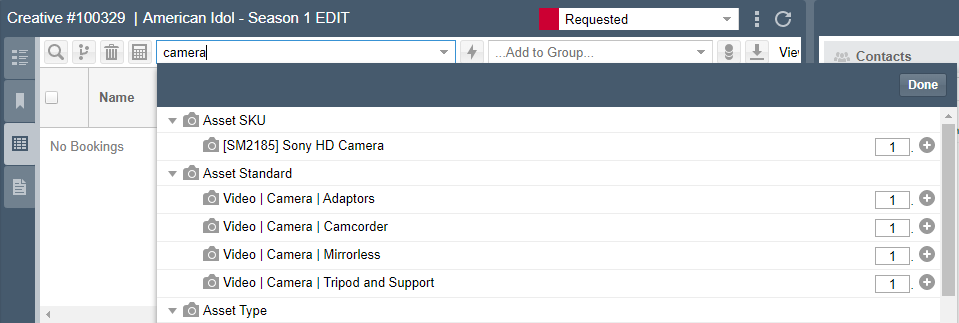
- Type the quantity of the Element that is needed in the text box adjacent to the name of the Element (i.e. two cameras)
- Click the plus
 icon to add the Element
 - If needed, add additional Elements
- When you are finished, click Done in the upper-right corner of the window