
Summary
Project creation is a way for users to track the life cycle of work being done at a high level. Projects can be stand-alone objects or they can be used as a container that holds one or more Orders. Before you request a Purchase Order and begin work, you need to set up a project in ShowMgr for tracking and billing purposes. This article walks you through the different ways to create and set up a Project in ShowMgr
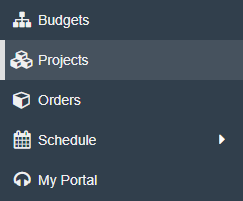
- Using the left navigation panel click Projects. Note: the Project Grid will be blank until a user initiates a search. Only at that time will their search results be visible in the Project Grid
- To create a new Project, click the
 button located at the top of the Project Grid to pull up the Project creation window
 - The Project creation window’s fields will vary based on your Access Level. Mandatory fields will be highlighted in red. Fill out all of the mandatory fields and as much information as possible in the other fields
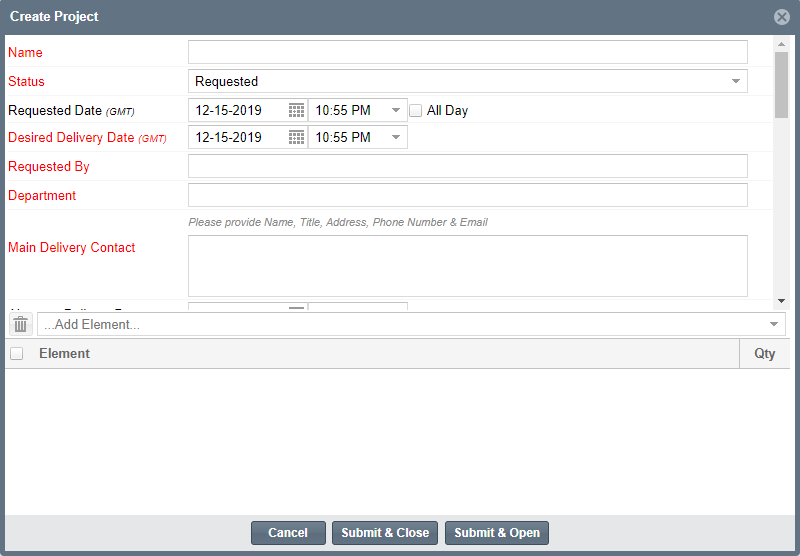
- Click Submit & Open to open the newly created Project. You can modify the Project’s information directly after creation, or click Submit & Close to close the form and return to the Project Grid
You can also create a Project from a Budget. See this article for more information: Creating a Project from a Budget
Details for existing Projects can be viewed in the Project Summary. If necessary, changes can be made to the project details after a project has been created.
To view the project summary for an existing Project:
- From the main left-hand navigation menu, select Projects to open the Project grid. Any open Projects will be listed in the grid
- If necessary, perform a search to locate the Project you wish to view details for
- When the desired Project is located, click the Project to view the Project's details. Use the Driver Tabs to edit the Project's details, add Orders, upload documents, add Bookings, and change the Project's status
Note: In order for a Project to show up in your My Active Project list under Project Request, the Project needs to be created by you through the Projects Grid and the Project Request feature.
Projects are separated into different Driver Tabs where you can edit details, add Orders, upload documents, add Bookings, and change your Project's status.
Driver Buttons (depending on user access levels) include:
 Details
- Edit the Project details including adding Contacts
 Worksheet
- View, Add, and Modify the Bookings and Actuals
 Phases & Milestones
- Used to track the progress of the Project
 Orders
- Used to attach Orders to the Project
 Documents
- Used to upload relevant documents to Project
The Project Worksheet tab displays the financial perspective of the Elements associated with a Project. The Project Schedule is also built from the Worksheet Tab. To access the Project Worksheet:
- Select a Project from the Project Grid to open the Project summary page
- Select the Worksheet Driver Tab
- If a Package was selected when the Project was created, a list of the Elements included in that Package and that are associated with the Project will be displayed
- If there are no Elements listed, or an Element you need for this Project is not displayed, you can add an Element
- Click an Element to open the Element Plan Details window, which contains the plan, source, and budget for that element. Make any desired changes, then click Submit
- To view the plan details (plan, source, and budget), pattern, and vendor history associated with that Element, click the Settings icon adjacent at the far right side of the screen
- To view the financial information for a Project, click the Views tab in the Options pane. You can choose to view revenue, costs, margins, and variances
- If you need to make changes to the financial information, such as the Units, UOM, or Rate, simply double-click the item you wish to change, then use the drop-down arrow to make a new selection. The changes are automatically reflected in the Totals pane at the bottom of the worksheet
- When you are finished with the worksheet, you are ready to build the Project schedule. This will automatically populate Orders for specific Elements as configured during the initial configuration process. To build the Project schedule, click the Build Schedule
 button the Worksheet toolbar
 - While reviewing the Orders, you may decide that some of the Order information, such as the status, dates, or times, need to be adjusted. To make changes, simply click the column that you wish to change, make the changes, then click the Update booking times icon on the right. The Order Time Modification Options window opens, confirming that you wish to make the desired changes
- Click Continue Order Submittal to save the changes
- It may be necessary for you to create additional orders for your Project. See the article Creating Orders to add a new Order
Note: It is not necessary for every task associated with a Project to have an Order assigned to it. For example, if you are using a contractor/talent to create a voiceover, you may choose to set this up as an Element and create a Purchase Order, instead of creating an Order
The Options pane in the Project Worksheet is used to perform various tasks, such as building Project schedules, creating and editing Purchase Orders, viewing and editing financial information, and creating reports.

- Build Schedule
- Places all of the Project Orders into a schedule
- Actualize
- Copies the budget costs and revenues for the selected Element into the actuals - this is useful if the budget costs, revenues, and actuals are the same so the information does not have to be entered manually
- Remove
- Remove the selected Element
- Purchase Order
- Create Purchase Orders for Project
- Views
- Change the Project view to be by Budget, Plan, Actual, or Order
To add an Element to a Project worksheet:
- Click the Add Element text box, then type the general name of the Element you wish to add. A list of Elements matching the name will display
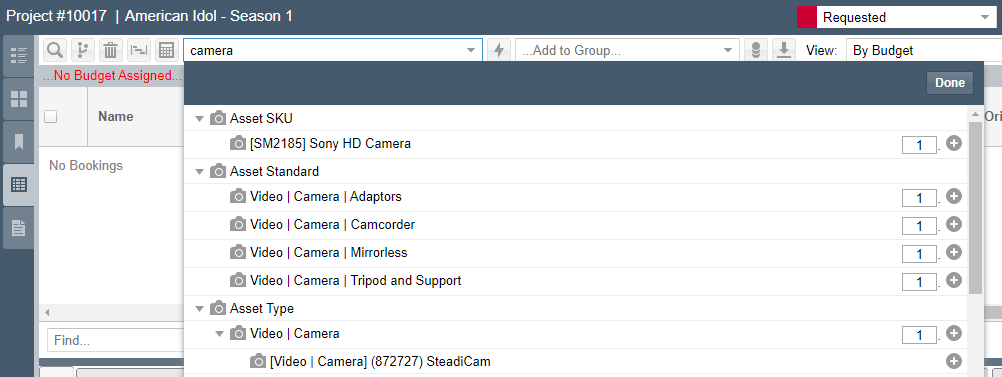
- Type the number needed in the text box adjacent to the generic name of the desired Element and select the + symbol
- If needed add additional Elements before clicking Done to close the window
If you do not have Master Project has part of your instance and think it could be useful or beneficial, please send us a message at support@showmgr.com. Where possible our team likes to find any other potential solutions before introducing another layer of complexity in your system.
It's possible to restrict who can create a new Project. You'll just need to remove a user's access to the Project menu item in the Admin section. Doing this will block them from adding new projects.
- From the main left-hand navigation menu select Navigation
- On the Projects row, uncheck the box next to any access groups who should not have access to the Project menu item
If you want the user to still be able to see Projects but not create new ones, please contact our Support Team and let us know which access group/s should have the ability to create new Projects and we'll configure a setting for you to hide the "+ New" button for Projects for everyone else.